

SPF(supported)
DKIM(recommended)
This article covers the SPF and DKIM authentication processes for Microsoft Office 365 and how they are managed in Valimail Enforce. While only one of the two authentication methods is required for an email to pass DMARC, our recommendation is to configure both whenever possible.
TABLE OF CONTENTS
- Configuring DKIM authentication for your Microsoft Office 365 emails
- Adding the Microsoft Office 365 DKIM keys in Enforce
- Configuring SPF authentication for your Microsoft Office 365 emails
- Enable SPF alignment in Microsoft Office 365 for your domain
Configuring DKIM authentication for your Microsoft Office 365 emails
All the accepted domains of your tenant will be shown in the Microsoft 365 Defender portal under the DKIM page. If you do not see it, add your accepted domain from domains page. Once your domain is added, follow the steps as shown below to configure DKIM.
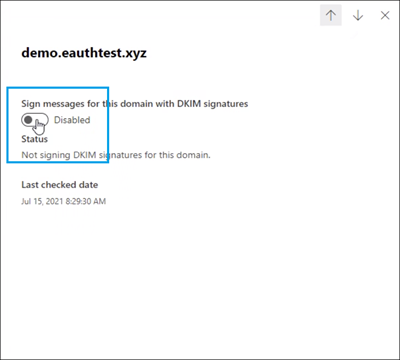
Step 1: On the DKIM page, select the domain you wish to configure.

Step 2: Slide the toggle to Enable. You will see a pop-up window stating that you need to add CNAME records.

Step 3: Copy the CNAMES shown in the pop up window.

Step 4: Publish the copied CNAME records to your DNS service provider.
Important: If you manage DKIM in Valimail, you will need to add the resulting 2 CNAME keys on your domain's Configuration page in Valimail Enforce.
Step 5: Return to DKIM page to enable DKIM.
You can also find the instructions on how to turn on DKIM in M365 for you domain, here.
Adding the Microsoft Office 365 DKIM keys in Enforce
1. Please go to your domain's Configuration page in Valimail Enforce and publish the newly created DKIM keys.
a. Scroll down and add the two DKIM keys in your configuration, by clicking on Add a DKIM key.
b. Enter the selector name, CNAME target value, associate the keys with Microsoft Office 365 and then click Add.

You can find more detailed information on how to add a DKIM key in Valimail Enforce here.
Configuring SPF authentication for your Microsoft Office 365 emails
Once you establish that Microsoft Office 365 is an authorized sender for your domain, you will need to add the service in your Enabled Senders list in Enforce.
1. Please go to your domain's Configuration page in Enforce.
2. Click on the + sign from the Enabled Senders section:

3. Choose Microsoft Office 365 from the list of configurable senders and then click Enforce:
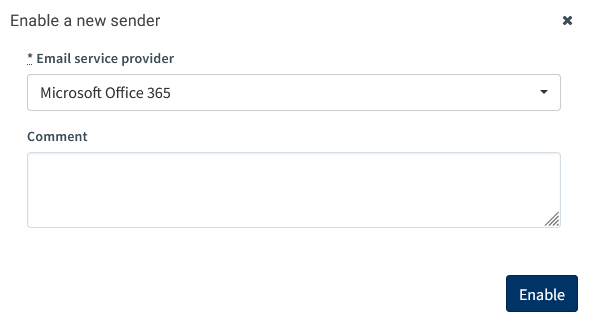
We encourage you to use the comment section for any useful information about your sending service, such as the name of the service owner, change request ticket numbers, etc.
You may notice that M365 emails are not authenticated via SPF, even after you have added M365 to your domain's configuration. This is likely caused by M365 not sending SPF aligned-mail and can be corrected by making sure SPF alignment for your domain has been turn on in M365.
Enable SPF alignment in Microsoft Office 365 for your domain
You can find out more details on how to make sure SPF alignment is enabled for your domain in Microsoft Office 365, here.
As always, if you have any questions, please don't hesitate to submit a ticket.