

KnowBe4 is a training and compliance service. They typically will send spoofing emails as your domain to your employees to test to see who opens the message(s) and to provide metrics on this. They then offer follow-up training as needed for your employees.
In order to prevent these training emails from going to the recipient's Spam or Junk folder, you will need to set up SPF and DKIM authentication for KnowBe4. The steps below require access to the KnowBe4 Account Settings page, so make sure that you have an account with proper access.
FYI: On the KnowBe4 help page they will instruct you to add their "include" statement to your SPF record. That is not needed when you use Valimail since we have automation in place that already takes care of that by using our SPF Macro:
TABLE OF CONTENTS
- Configuring DKIM authentication for your KnowBe4 emails
- Add a KnowBe4 DKIM key in Enforce
- Configuring SPF authentication for your KnowBe4 emails
- Enable SPF alignment in KnowBe4 for your domain
Configuring DKIM authentication for your KnowBe4 emails
The steps below outline the process involved in creating a custom DKIM signature for your domain, which will sign the emails send by KnowBe4 on your behalf. DKIM is configured separately for the Phishing and Training emails.
Enabling DKIM Signatures for Phishing Emails
By default, all KnowBe4 training emails contain a DKIM signature but phishing emails require the account owner to enable this feature first. See below for steps on how to enable DKIM signatures for phishing emails.
1. Log in to your KnowBe4 account.
2. Click on your email in the upper-right corner and click Account Settings.
3. Under the Phishing Settings section, click the checkbox labeled Enable DKIM signature.

4. Click Save Changes.
All KnowBe4 phishing emails will now contain KnowBe4’s signing domain and can be used to verify if a phishing email is from KnowBe4 or a real phishing attack. See the section below for information on how to customize the signing domain for phishing and training emails.
Using Custom DKIM Signatures in KnowBe4 Phishing Emails
After enabling DKIM signatures, your organization can adjust the signing domain for your organization’s needs. See the instructions below to use your own signing domain for phishing emails.
1. Log in to your KnowBe4 account.
2. Click on your email in the top-right corner and click Account Settings.
3. Under the Phishing Settings section, click the checkbox labeled Enable DKIM signature if you haven’t enabled DKIM signatures already.
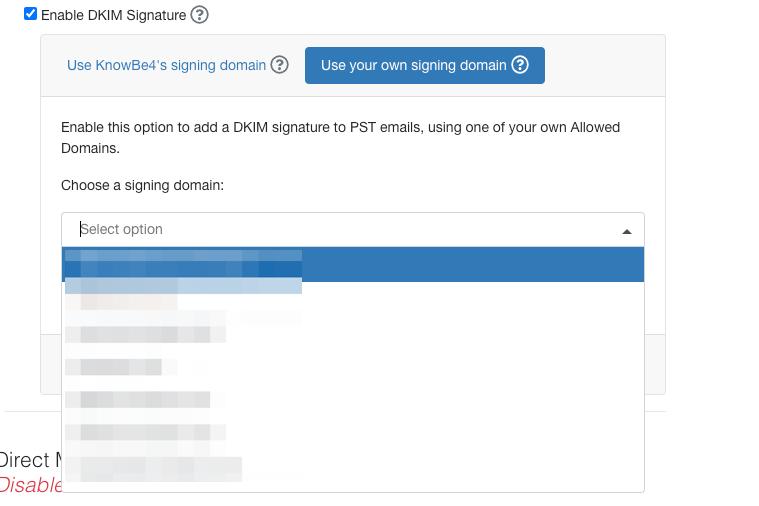
4. Click the button labeled Use your own signing domain.

5. Choose the domain you wish to use. To add a domain to this drop-down, you will first need to add the domain as an Allowed Domain in your KnowBe4 account. For more information on this topic, please see How to Add and Verify Allowed Domains.
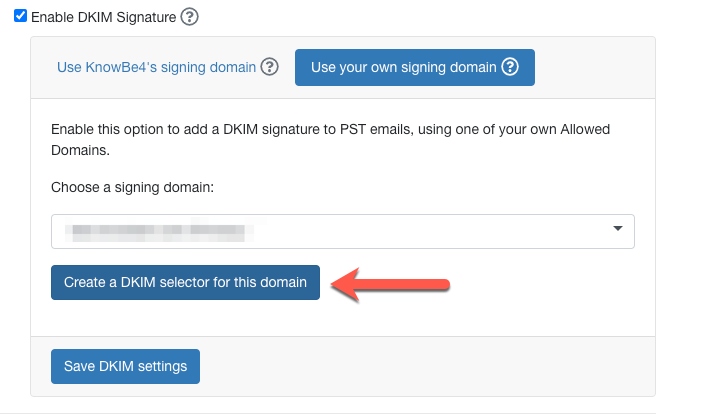
6. Click Create a DKIM selector for this domain.
7. Copy the host name and values provided in the pop-up.
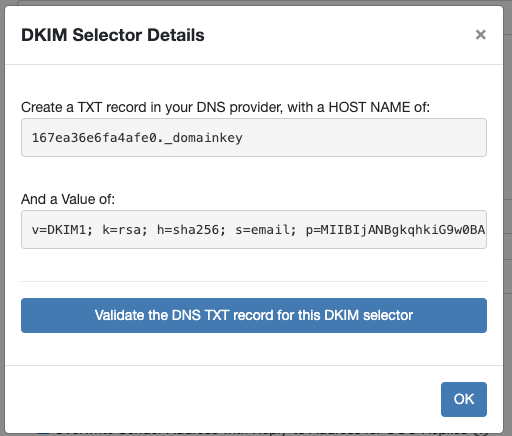
8. Add the DKIM key in Valimail Enforce.
9. Once you’ve added the DKIM TXT record in Valimail Enforce, click on the Validate the DNS TXT record for this DKIM selector button to make sure the validation of the published record is done.
10. Click OK in the DKIM Selectors Details window in your KMSAT console.
11. Click Save Changes at the bottom of your Account Settings.
Using Custom DKIM Signatures in KnowBe4 Training Emails
You can also use custom DKIM signatures for your training emails. See the instructions below to use your own signing domain in training emails.
1. Log in to your KnowBe4 account.
2. Click on your email in the upper-right corner and click Account Settings.
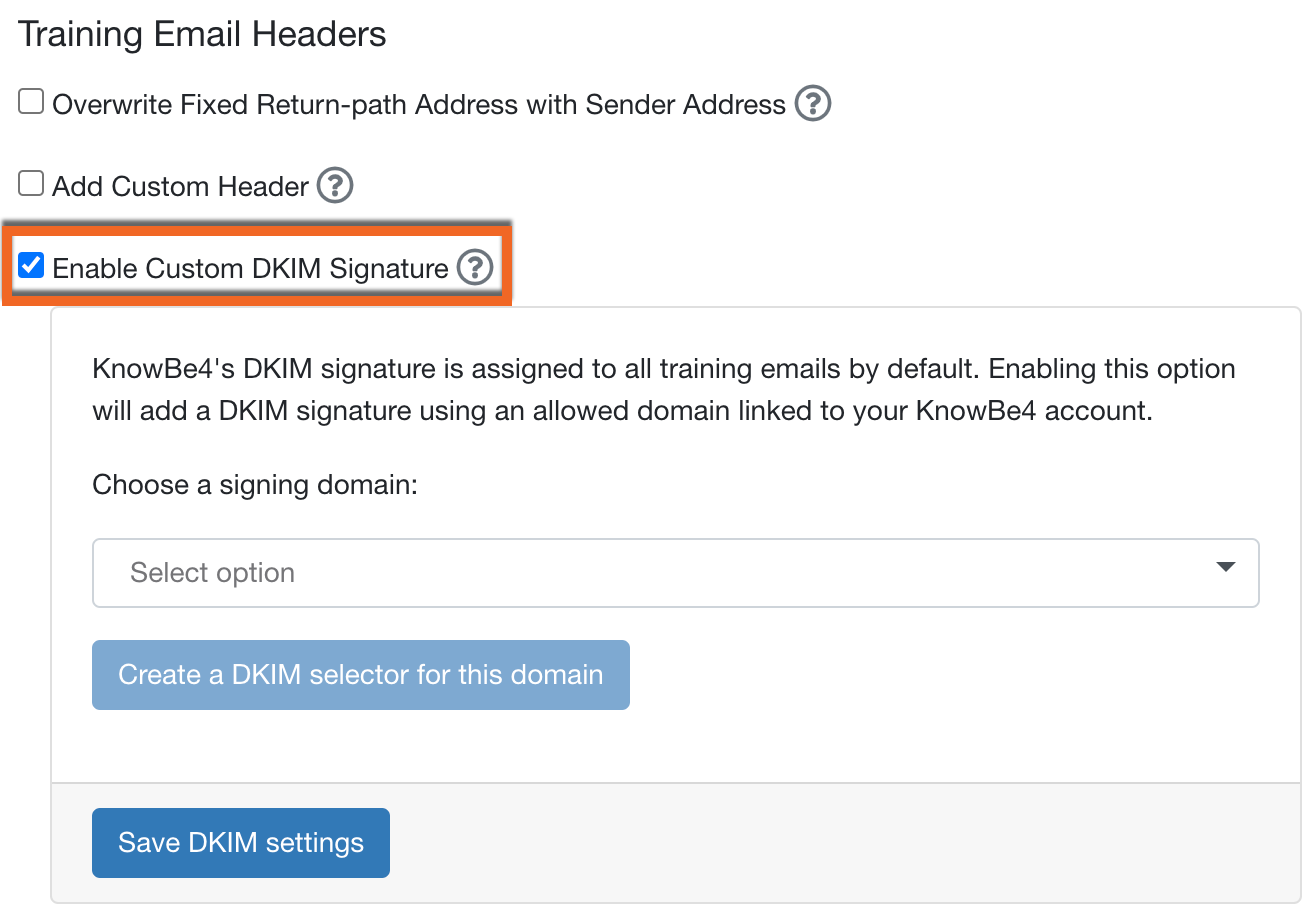
3. Under the Training Settings section, click the checkbox labeled Enable Custom DKIM Signature if you haven’t enabled DKIM signatures already.
4. Repeat all the next steps from the Using Custom DKIM Signatures in KnowBe4 Phishing Emails section presented above.
You can also find the instructions for how to set up DKIM for KnowBe4 here.
Add a KnowBe4 DKIM key in Enforce
1. Go to your domain's Configuration page in Valimail Enforce and publish the newly created DKIM key.
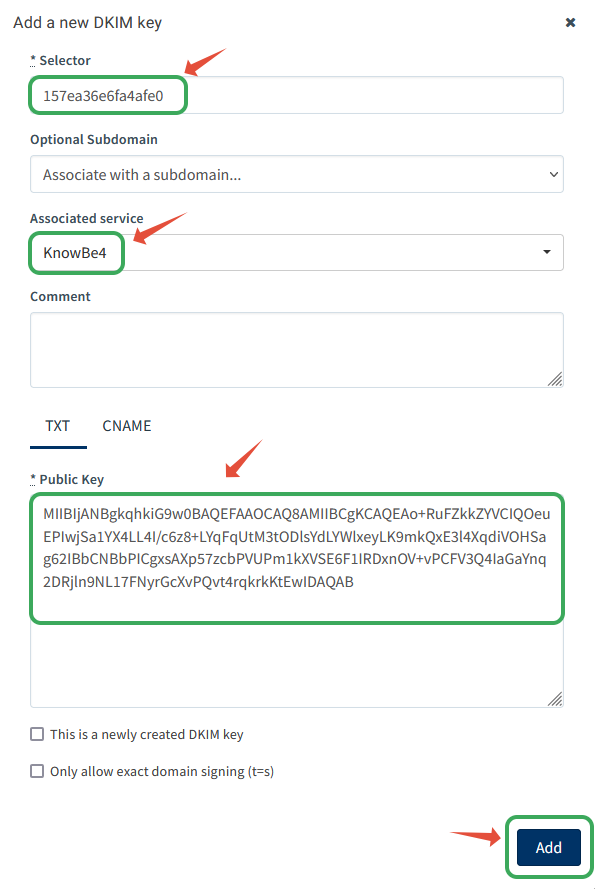
a. Scroll down and add the DKIM key in your configuration, by clicking on Add a DKIM key.
b. Enter the selector name, the DKIM TXT value (the actual value is the entire string after the p= tag), associate the key with KnowBe4 and then click Add.
You can find more detailed information on how to add a DKIM key in Valimail Enforce here.
Configuring SPF authentication for your KnowBe4 emails
Once you establish that KnowBe4 is an authorized sender for your domain, you will need to add the service in your Enabled Senders list in Enforce.
1. Please go to your domain's Configuration page in Enforce.
2. Click on the + sign from the Enabled Senders section:

3. Choose KnowBe4 from the list of configurable senders and then click Enable:

We encourage you to use the comment section for any useful information about your sending service, such as the name of the service owner, change request ticket numbers, etc.
Enable SPF alignment in KnowBe4 for your domain
This section explains what steps you need to follow in order to configure SPF alignment for the emails sent by KnowBe4 on behalf of your domain.
Align the Return-Path domain on your Phishing Emails
1. Log in to your KnowBe4 admin account.
2. Click your email address on the top-right of the screen, then click Account Settings.
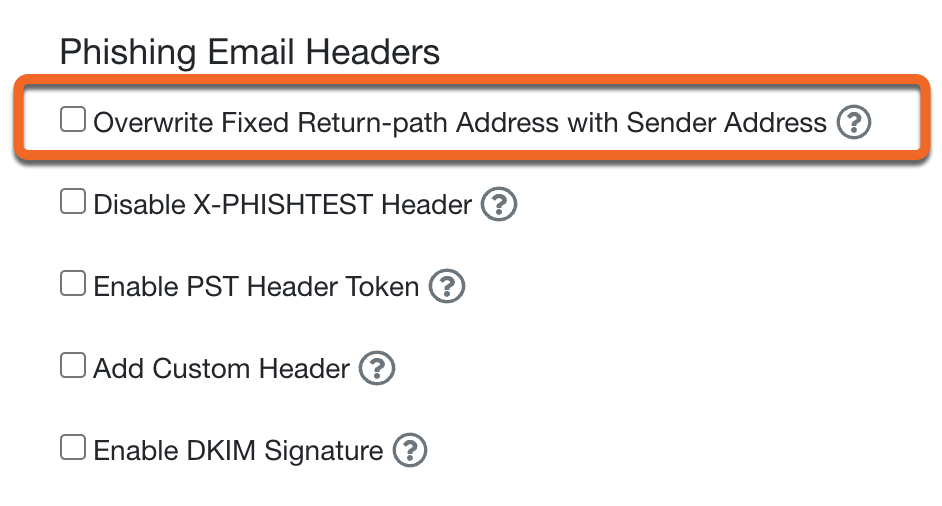
3. Navigate to the Phishing Settings section.
4. Under the Phishing Email Headers subsection, click the checkbox next to Overwrite Fixed Return-path Address with Sender Address.
5. Save your settings by clicking Save Changes at the bottom of the page.
Align the Return-Path domain on your Training Emails.
1. Log in to your KnowBe4 admin account.
2. Click your email address on the top-right of the screen, then click Account Settings.
3. Navigate to the Training Settings section.
4. Under the Training Email Headers subsection, click the checkbox next to Overwrite Fixed Return-path Address with Sender Address.

5. Save your settings by clicking Save Changes at the bottom of the page.
Note: If you have a free KnowBe4 account, you will need to contact their support and ask them to make these changes for your account.
As always, if you have any questions, please don't hesitate to submit a ticket.