

First, set things up in the Azure Portal
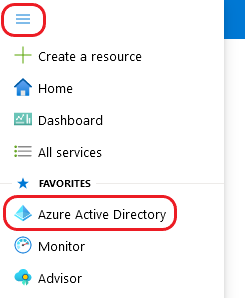
1. In the Azure portal, click on the hamburger button on the top left and select Azure Active Directory from the portal menu.
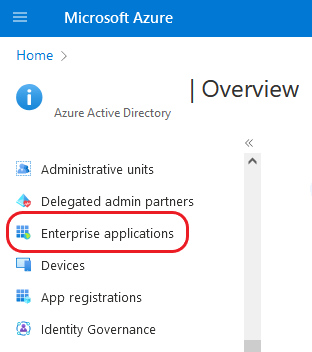
2. Navigate to Enterprise Applications.
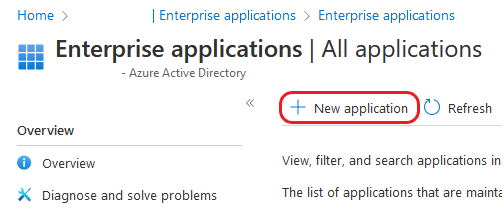
3. Click the New application button.
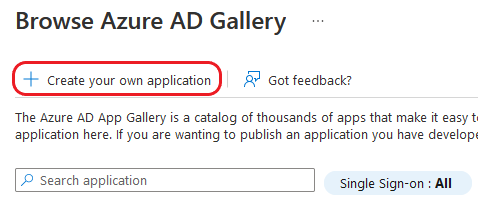
4. Click on Create your own application.
5. Enter the name of the application as you'd like it to appear to your users (e.g. Valimail).

6. Select Integrate any other application you don't find in the gallery (Non-gallery), then click Create.

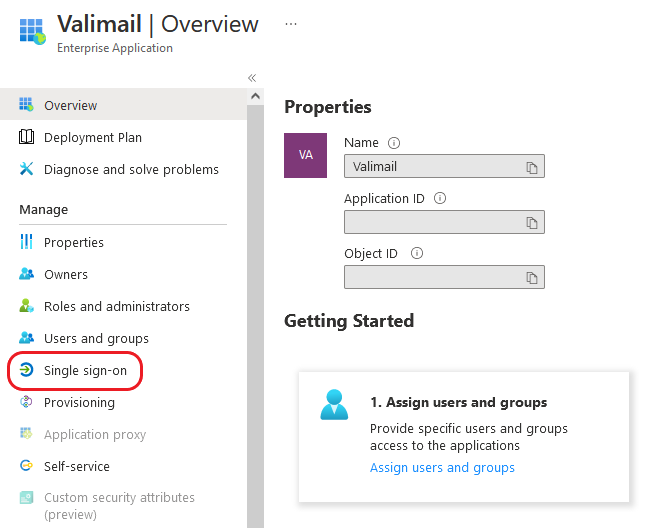
7. Select Single sign-on from the left navigation panel.
8. Click on the SAML tile.

9. Click the edit (pencil) button in the Basic SAML Configuration section.
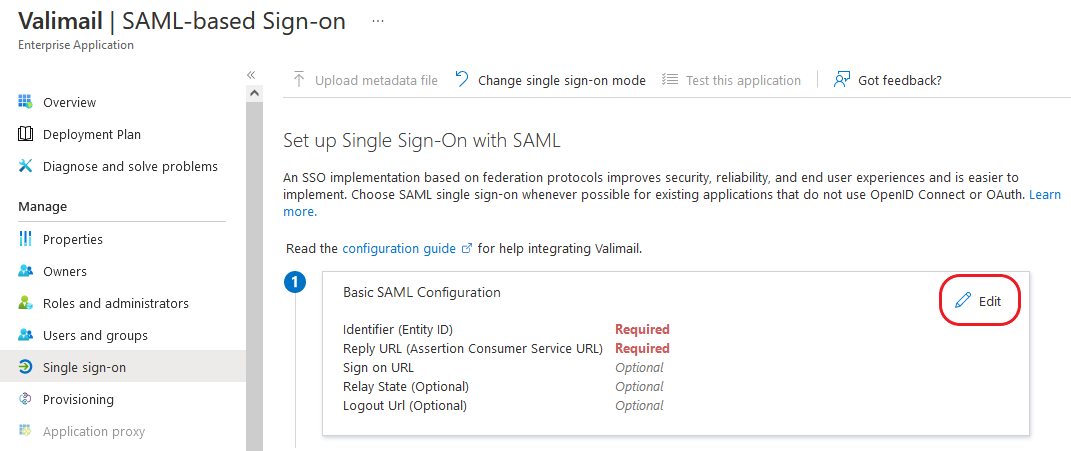
10. In the Basic SAML Configuration screen, enter the values as indicated below:
- Identified (Entity ID): https://app.valimail.com
- Reply URL (Assertion Consumer Service URL): https://app.valimail.com/sso/consume
- Sign on URL: <leave blank>
- Relay State: <leave blank>
- Logout URL: https://app.valimail.com/sso/consume

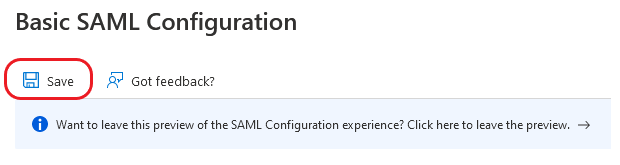
11. Click the Save button.
12. Click the edit (pencil) button in the Attributes & Claims section in the right navigation panel.
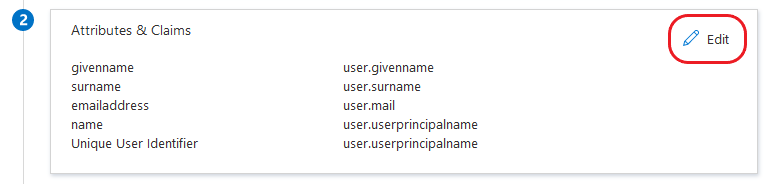
13. Ensure only the claims shown below exist. Any additional claims should be deleted.
⚠️Important Points:
- The FirstName and LastName claim names are case-sensitive and must appear exactly as shown below for SSO to successfully work.
- The ...nameidentifier claim is added by default and is required by SAML 2.0. Microsoft Azure will not permit the deletion of this claim.

14. After the Attributes & Claims are added, go back to the previous screen.

15. Click the Download link next to Federation Metadata XML and save the metadata XML file.

16. Go to Users and Groups from the navigation panel on the left, then click on Add user/group.
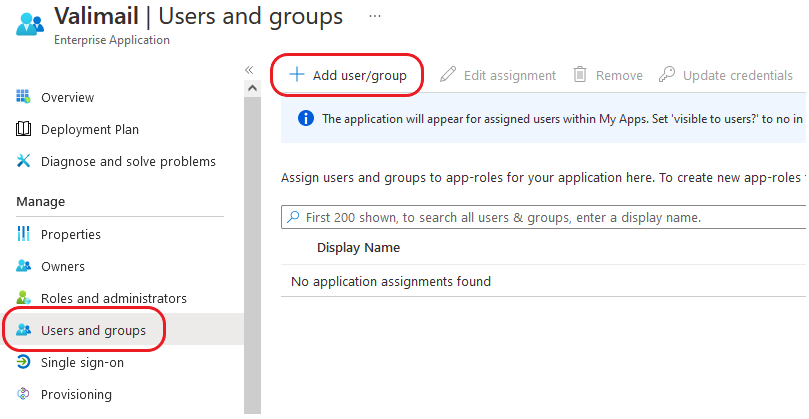
17. Assign the Valimail application to individual users or groups.
Set things up in the Valimail platform
1. Be sure to add any users who should have SSO access to Valimail, including the administrator user with which you are currently logged into Azure AD.
⚠️SSO testing will fail unless you add your user during this step and also ensure the user has already been invited to the Valimail Product under Account Settings > Users.
2. In a new browser tab/window, go to https://app.valimail.com and log in to Valimail with your username and password.
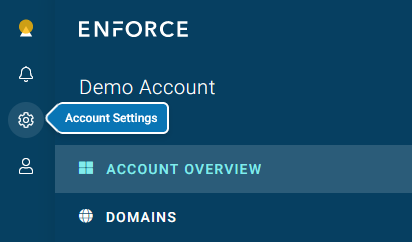
3. Click on the Account Settings button.
4. Go to the Single Sign-On section and click on the Setup button.

5. In the Single Sign-On (SSO) for Users click upload IDP metadata file.

6. Click on Browse and locate the XML metadata file you saved in a previous step and upload it.

7. Click Save.

Test it Out
1. Testing IdP-initiated SSO: Open up a private/incognito window in your browser and go to the Microsoft Azure AD login portal, log in with your Microsoft Azure AD credentials. If SSO was successful, you'll arrive at the Valimail home page for your account.
2. Testing SP-initiated SSO: Open up a private/incognito window in your browser and go to https://app.valimail.com and enter your Azure AD username (which is usually an email address). The password field will become disabled and you can click Log In with SSO. You will then be taken to the Azure AD login screen and the IdP-initiated login flow. If SSO was successful, you'll arrive at the Valimail home page for your account.
